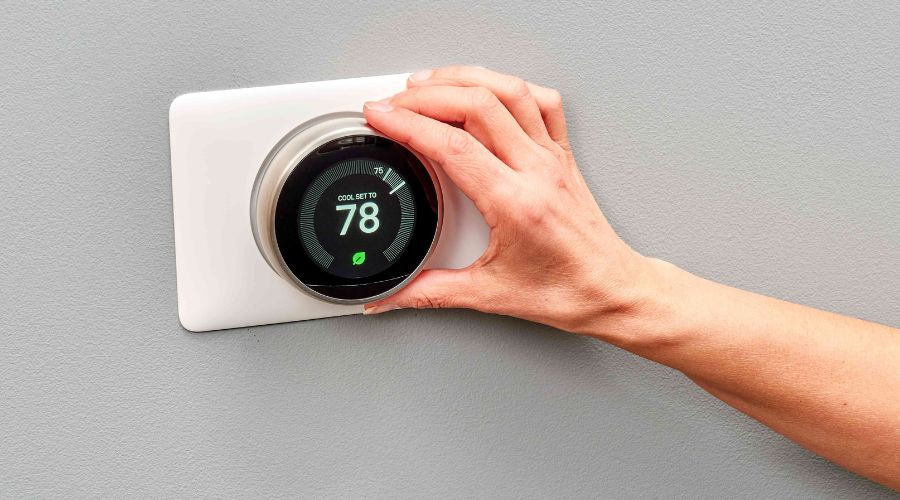
Installing a new thermostat is one of the simplest yet most impactful upgrades you can make to your home. Whether you’re replacing an outdated model or upgrading to a smart thermostat, proper installation is crucial for maximizing energy efficiency and comfort.
Why Install a New Thermostat?
Before diving into the installation process, it’s worth understanding the benefits of a new thermostat
- Improved Energy Efficiency
- Modern thermostats, particularly programmable and smart models, allow precise temperature control, minimizing energy waste.
- Enhanced Comfort
- Advanced thermostats maintain consistent indoor temperatures and allow for customizable settings.
- Cost Savings
- Reducing unnecessary HVAC usage can lower utility bills, saving you money over time.
- Convenience and Control
- Smart thermostats offer remote access, learning capabilities, and integration with smart home systems.
Tools and Materials Needed for Thermostat Installation
Before starting the installation, gather the following tools and materials
- New thermostat -ensure compatibility with your HVAC system
- Screwdriver -flathead and Phillips
- Drill -optional, for mounting
- Level
- Wire labels -often included with new thermostats
- Voltage tester -to ensure safe handling of wires
- Thermostat manual
Step-by-Step Guide to Install a New Thermostat
1. Turn Off Power to the HVAC System
Safety first! Locate your home’s circuit breaker and turn off the power to your HVAC system. Use a voltage tester to confirm there is no electricity running to the thermostat wires.
2. Remove the Old Thermostat
- Gently detach the cover of the old thermostat.
- Unscrew the mounting plate from the wall and disconnect the wires.
- Label each wire according to its terminal using the labels provided with your new thermostat. This step is crucial to ensure proper connections later.
3. Prepare the Wall for the New Thermostat
- Inspect the wall for damage or uneven surfaces.
- Use a level to ensure the new thermostat will sit straight.
- Patch any holes or imperfections as needed.
4. Mount the New Thermostat Base
- Position the base of the new thermostat on the wall.
- Thread the wires through the designated opening in the base.
- Secure the base to the wall using screws, ensuring it’s level.
5. Connect the Wires to the Thermostat Terminals
- Match the labeled wires to their corresponding terminals on the new thermostat.
- Secure each wire by tightening the terminal screws. Common wire labels include
- R -Red Power supply
- W -White Heating control
- Y -Yellow Cooling control
- G -Green Fan control
- C -Blue/Black Common wire -for smart thermostats requiring constant power
6. Attach the Thermostat to the Base
- Snap or screw the thermostat’s display unit onto the mounted base.
- Ensure it’s securely in place and aligned properly.
7. Restore Power and Test the Thermostat
- Turn the power back on at the circuit breaker.
- Follow the thermostat’s setup instructions to configure settings, connect to Wi-Fi (for smart models), and test heating, cooling, and fan functions.
Common Challenges During Installation and How to Overcome Them
1. Missing or Incompatible Wires
Some older homes may lack a “C” wire required for smart thermostats.
- Solution
- Use a power extender kit -often included with smart thermostats or consult an HVAC professional to add a “C” wire.
2. Incorrect Wiring
Improper connections can cause the thermostat or HVAC system to malfunction.
- Solution
- Double-check wire labels and consult the thermostat manual.
3. Uneven Wall Surface
An uneven wall can make the thermostat appear crooked.
- Solution
- Use a level during installation and add a mounting plate if needed.
4. Wi-Fi Connection Issues -For Smart Thermostats
Difficulty connecting to your network can delay setup.
- Solution
- Ensure a strong Wi-Fi signal near the thermostat and check the router settings for compatibility.
How a New Thermostat Improves Energy Efficiency
Installing a modern thermostat goes beyond convenience—it can dramatically reduce energy consumption and costs.
1. Programmable Schedules
- Set heating and cooling schedules to align with your daily routine. For example
- Lower temperatures while you’re asleep or away.
- Automatically return to a comfortable setting before you wake up or return home.
2. Learning Capabilities
- Smart thermostats adapt to your preferences over time, optimizing energy usage without manual input.
3. Remote Access
- Use a smartphone app to adjust the thermostat remotely, ensuring efficiency even when plans change.
4. Zoning Compatibility
- Advanced thermostats support zoned HVAC systems, allowing you to control temperatures in specific areas, reducing waste in unoccupied rooms.
5. Energy Usage Insights
- Many smart thermostats provide detailed energy reports, helping you identify opportunities for further savings.
Signs You Need a New Thermostat
If you’re unsure whether it’s time to upgrade, watch for these signs
- Inconsistent Temperatures
- Rooms feel too hot or cold despite HVAC adjustments.
- High Energy Bills
- An outdated thermostat may be causing your system to overwork.
- Frequent Cycling
- The HVAC system turns on and off excessively, indicating a malfunction.
- Unresponsive Controls
- Delayed or no response when adjusting the thermostat.
- Outdated Technology
- Manual thermostats lack the energy-saving features of modern models.
Tips for Choosing the Right Thermostat
- Evaluate Your HVAC System
- Ensure the thermostat is compatible with your system e.g., central air, heat pump, zoned HVAC.
- Consider Your Lifestyle
- A programmable thermostat works well for predictable routines, while a smart thermostat suits dynamic schedules.
- Budget for Features
- Smart thermostats cost more upfront but offer long-term savings through energy efficiency.
- Prioritize Ease of Use
- Choose a model with intuitive controls and clear instructions.
- Check Smart Home Integration
- If you use voice assistants or other smart devices, ensure compatibility with your thermostat.
Professional vs. DIY Installation: Which Is Right for You?
While many homeowners can handle thermostat installation themselves, certain situations may require professional assistance.
When to DIY
- Replacing an existing thermostat with the same type.
- The wiring is straightforward and well-labeled.
When to Call a Professional
- Installing a smart thermostat in a home without a “C” wire.
- Adding zoning capabilities or integrating with advanced HVAC systems.
- Encountering complex wiring or compatibility issues.
FAQs About Thermostat Installation
1. How long does it take to install a thermostat?
- Most installations take 1–2 hours, depending on complexity.
2. Can I install a smart thermostat without a “C” wire?
- Yes, many smart thermostats include a power extender kit or offer battery-powered options.
3. Will a new thermostat save me money?
- Yes, modern thermostats can reduce energy bills by up to 20% through efficient temperature management.
4. Do I need to rewire my HVAC system for a new thermostat?
- In most cases, rewiring isn’t necessary unless adding a “C” wire or upgrading to a more complex system.
5. Are smart thermostats worth the investment?
- Absolutely. The long-term energy savings and convenience often outweigh the initial cost.
Installing a new thermostat is a straightforward project that can have a profound impact on your home’s energy efficiency and comfort. By following this step-by-step guide, you can confidently upgrade your thermostat, optimize HVAC performance, and enjoy lower utility bills. Whether you choose a programmable model or a state-of-the-art smart thermostat, the key is proper installation and configuration.
For more complex setups or compatibility concerns, don’t hesitate to consult an HVAC professional. With the right thermostat in place, your home will be more comfortable, efficient, and cost-effective year-round.


